Here, I’m going to explain how we can perform custom disk partitioning while installing a CentOS system. This is a continuity to my earlier blog in which I wrote about the installation of CentOS 6.5 Minimal system. If you haven’t read my previous blog and want to know from where I’m continuing this blog, please read this blog first:
Custom Disk Partitioning
Now, let’s get started. After I selected Custom Disk Partitioning during the installation of CentOS, I reached this screen:
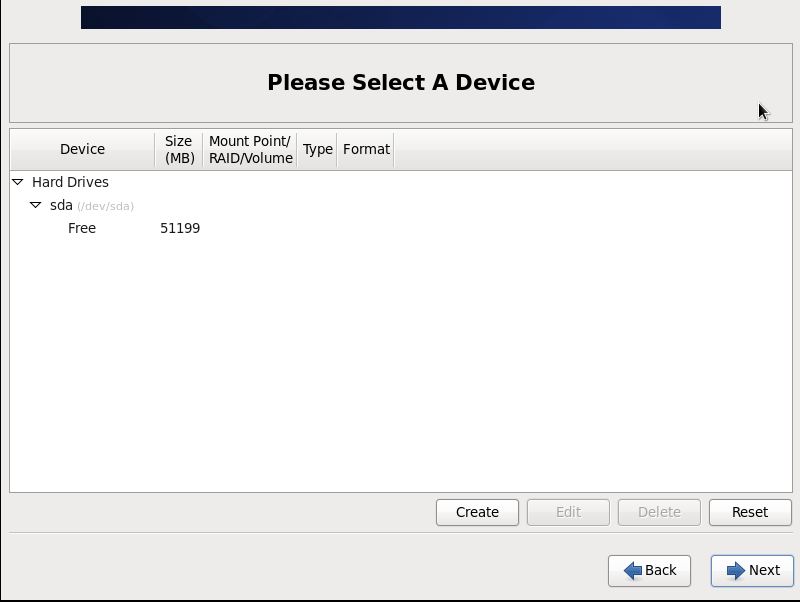
It is evident from this screenshot that I’ve got my disk named as sda and sized as approximately 5 GB, which is free initially. So, I clicked on Create button to create new partitions for my system.

First of all, I created a boot partition for my system in which this system’s boot files would be stored. It doesn’t really matter which partition we create first or last. But since I’m going to create Logical Volume Management(LVM) for this setup and boot partition should always be of type Standard, I created it first and specified it to be Standard partition. I created this boot partition with mount point of /boot, file system type of ext4 and size of about 400 MB. This partition is created as sda1 inside the disk sda.
Once it is created, I can go ahead and assign the rest of the disk space to a logical volume group. If you don’t want to have LVM, you can simply create all other partitions with Standard Volume Type and assign their respective mount point and size.

For now, I’m creating a LVM Physical Volume. This is the place where all the rest of the partitions will be created and stored.

Since we would usually like to use all the free space in our disk, we select “Fill to maximum allowable size” so that this logical volume will best utilize our disk space.

After this LVM Physical Volume is created, we can see that we have created two partitions in our disk: sda1 for boot partition and sda2 for LVM Physical Volume. Now, let’s create our remaining partitions inside our LVM. To do so, click again on Create and choose “LVM Volume Group“, then click on Create. Inside Make LVM Volume Group window, assign a name to this volume group, then start adding logical volumes by clicking Add button within Logical Volumes section.

Now, let’s create a Swap volume by choosing File System Type as swap and assigning its name and size. The best practice for creating swap partition is to assign it twice the capacity of its RAM. However, we can assign it as much as we feel proper.

We can create a Root partition by assigning the logical volume’s mount point as /. This is the place where our system’s entire file system is kept and it acts as the root for the system hierarchy. It is the must-have partition for any linux system along with swap. The rest of the partitions are also important, however it isn’t mandatory to create them manually because they’ll be created automatically by the system itself inside the root partition if we don’t manually create them.

For this case, I’m creating some more partitions as well. I created a temporary file partition by mounting it in /tmp mount point and assigning it the size of my choice.

I also created an optional file system by mounting it in /opt mount point and assigning it the size of my choice. Generally, this is the partition where we keep our applications like Zimbra, ArcSight Logger, LAMP, and so on. So, we allocate its size according to our plans for certain application or software. Similarly, we can create other custom partitions like /var, and /home, based on our requirements.
Custom Disk Partitioning – Summary

After creating the required partitions or logical volumes, my partition table looked like above.

When we’re satisfied with our disk provisioning, we can click on Next and then Format the disk for writing new file system to it.

At last, the installer asks to confirm the location of the boot loader for CentOS. For a fresh/free disk or machine, we can simply accept the default value and click Next to complete the installation process.
I hope you found it informative. Please let me know in the below Comments section if you’ve any question or suggestion for me.
Leave a Reply