Little ago, I posted that I was going to migrate this blogging site to Amazon Web Services (AWS). Now that I’ve already completed the migration, I thought it’ll be worth sharing my migration procedures because there might be people who would like to do the similar task. In this post, I’m going to cover how I performed the backup and export of my content from existing site and then, configured it in AWS environment. So, let’s begin.
Backup an Old Site
If you haven’t realized it already, I’ve been using WordPress to build this blog. WordPress is an open-source blogging and content-management system based on PHP and MySQL. It comes with huge amount of plugins to fulfill various requirements of a website, among which Import and Export tools are also present. To backup my contents, I simply clicked on Export inside Tools and it downloaded an XML file to my local computer. Remember that, this XML file doesn’t contain your media contents; instead, it contains links to those contents in the original site. Therefore, we must have our old site running while restoring the blog in new site. During the restoration, the new WordPress communicates with old site and fetches the media contents to its local library.
Apart from Export/Import tools, I also strongly suggest you to take the whole backup of your website. For me, I have been backing up my WordPress to my Dropbox account. And there are numerous plugins to do this as well. The one I’m using is WPB2D. Make sure that you take regular backup of your blog using one of your favorite backup tools.
Amazon Web Services
AWS is the world’s largest public cloud service provider. It is a subsidiary of Amazon.com and has its data-centers across the globe. They’ve got a whole suite of cloud services to help their customers run a complete data-center without having to worry about the low-level details and complexities. They also provide a free tier service to let their customers learn and understand their infrastructure and I’m going to utilize this service in this post.
Launching an AWS Instance
AWS instance is similar to the virtual machine that we run on Virtual platforms like VMware, VirtualBox, HyperV, and so on. The part of AWS cloud that serves instances is called Elastic Compute Cloud (EC2). If you’re wondering which virtual platform does EC2 use to run VMs, then the answer is Xen.
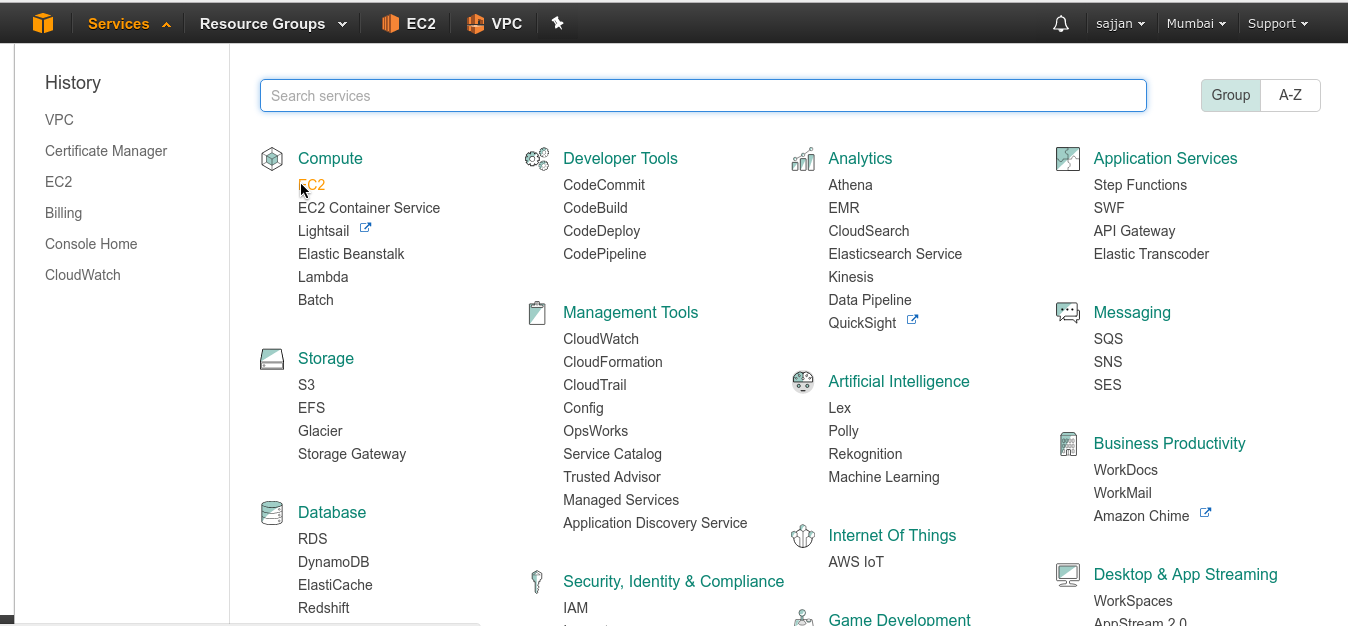
Now, to launch an instance, we first need to login into AWS Management Console, which is only available to registered users. So, go ahead and register yourself. Registration is free, but you have to verify yourself by providing your Credit card details. Once logged into AWS, we can navigate to EC2 by expanding the Services and clicking on EC2.
Inside EC2, we can launch and manage our virtual instances. To launch a new instance, go to Instances and click on Launch Instance. Here’s how the launch instance wizard looks like:

There is a wide range of available Amazon Machine Images from which we can deploy our virtual instance. This is similar to our traditional ISO installer that we used to have for booting operating systems. For this purpose, I chose the first option i.e. Amazon Linux, which I found to be much similar to CentOS.
In the next step, we need to choose the instance type. There are multiple predefined types designed for different workloads. Note that, we won’t be allocating CPUs, Memory, Storage, and Network capacities in AWS instances as we used to do while creating VMs. Instead, these system specifications are defined by the instance types and we’ve to select the appropriate type for our workload. In my case, I’m choosing t2.micro, which contains 1 CPU, 1 GB RAM, and around 10 GB of EBS storage. The good part is we can use this instance type under free tier service.

Once instance type is selected, we can click on Review and Launch button to start this newly created instance. Once launched, AWS generates a SSH key to the linux instance, which we can use locally to access our instance. By default, AWS also configures network interfaces, private and public IPs, and security groups to get our instances started. We can then configure these settings as per our requirements.
First, I configured my Security Group to allow SSH access to my instance from my public IP. I also allowed HTTP and HTTPS services to my instance from anywhere because this instance is supposed to serve web content. But we may want to block these services for security reasons until our web server is fully configured.

Next, we would also like to have a static IP assigned to our instance so that it won’t change the next time we try to access it. This can be done using Elastic IPs. AWS provides Elastic IPs also for free, provided that they’re associated with an instance. But if we allocate Elastic IPs and not associate it with any instance, then AWS charges us.

Configuring Web Server in AWS Instance
Up to this stage, our instance is ready for use. So, let’s go ahead and configure it to serve our intended web application. To do so, we first need to SSH to this machine. If you’re wondering what would be the SSH access parameters, then they’d be as follows:
SSH server: your public Elastic IP
SSH Key: the SSH key file (.pem) you downloaded during instance launch
SSH user: ec2-user
Password: No need, since we’re using key file
So, my SSH login command would look like this:
[code]$ ssh -i <key-file> ec2-user@<public-ip/dns-name>[/code]
Then, here’s the list of commands that I entered inside my linux instance to configure my server:
[code language=”bash”]
# Update yum repository
[ec2-user@blog ~]$ sudo yum update
# Install apache, mysql and php
[ec2-user@blog ~]$ sudo yum install -y httpd24 php56 mysql55-server php56-mysqlnd && sudo yum clean all
# Start apache and mysql daemons
[ec2-user@blog ~]$ sudo service httpd start && sudo service mysqld start
# Startup apache and mysql on startup
[ec2-user@blog ~]$ sudo chkconfig httpd on && sudo chkconfig mysqld on
# Create a user group to manage web content
[ec2-user@blog ~]$ sudo groupadd www
# Add user to newly created group
[ec2-user@blog ~]$ sudo usermod -a -G www ec2-user
# Set permissions for this group on our web folder
[ec2-user@blog ~]$ sudo chown -R root:www /var/www
[ec2-user@blog ~]$ sudo chmod 2775 /var/www
[ec2-user@blog ~]$ find /var/www -type d -exec sudo chmod 2775 {} \;
[ec2-user@blog ~]$ find /var/www -type -f -exec sudo chmod 0664 {} \;
[ec2-user@blog ~]$ find /var/www -type f -exec sudo chmod 0664 {} \;
# Perform some security configurations in mysql like disabling anonymous login and strong password for root user
[ec2-user@blog ~]$ sudo mysql_secure_installation
# Create a database for web application
[ec2-user@blog ~]$ sudo mysqladmin -uroot -p create blog
# Downloading and installing WordPress
[ec2-user@blog ~]$ cd /var/www/html
[ec2-user@blog ~]$ wget http://wordpress.org/latest.tar.gz
[ec2-user@blog ~]$ tar xzvf latest.tar.gz
[ec2-user@blog ~]$ mv wordpress blog
# Configuring WordPress configuration file
[ec2-user@blog ~]$ mv wp-config-sample.php wp-config.php
# Provide your database name, user and password inside this config file e.g.
define(‘DB_NAME’, ‘blog’);
define(‘DB_USER’, ‘root’);
define(‘DB_PASSWORD’, ‘<root-password>’);
define(‘DB_HOST’, ‘localhost’);
# Note: You may also like to create and use some other user than root for security purposes.
[/code]
Before accessing web page, let’s also make folder blog as our web server’s root path so that we don’t have to enter /blog every time we access our website. This can be done by setting DocumentRoot statement in httpd.conf file.
[code language=”bash”]
[ec2-user@blog ~]$ sudo vi /etc/httpd/conf/httpd.conf
DocumentRoot "/var/www/html/blog"
# Restart apache to implement change
[ec2-user@blog ~]$ sudo service httpd restart
[/code]
After performing above steps, I browsed my instance’s public IP in my web browser. As expected, it launched an installation page for WordPress, which was pretty straight forward. Then, the first thing I tried after successful installation of WordPress, was to import the exported data from my existing site. To do so, I navigated to Tools > Import, and tried to install a plugin called WordPress Importer. However, it opened up a dialog to setup FTP address to store this site’s data.

The reason behind this issue is that the user running this web application doesn’t have write access to the source directory. In fact, it makes a lot sense also because a user called apache is running the Apache process, but our web source directory is owned by a user called ec2-user. And our current file permissions allow write privilege to the owner alone. So, we need to either change ownership of our web source to apache user or allow write privileges to group or others (least secure way).
[code language=”bash”]
# Assign ownership of blog to apache user
[ec2-user@blog ~]$ sudo chown -R apache:www /var/www/html/blog
# OR, add apache user to www group and allow write for www group
[ec2-user@blgo ~]$ sudo usermod -aG www apache
[ec2-user@blog ~]$ sudo chmod -R g+w /var/www/html/blog
[/code]
After this minor change, let’s reload our web page and try again to import the exported XML file. This time it worked for me. The import took some time and once it completed, I found everything (posts, pages, original media files and comments) working correctly. The plugins and my custom widget settings weren’t imported from old site, but I was okay with it. The only issue that effected me was the broken images in my posts.
Upon troubleshooting, I realized that all of my posts were missing images linked to them, though the original versions of those images were working in my new site. Actually, the links or paths to the images were correctly imported, but the custom-size images themselves weren’t being shown.
When I compared the files present in the uploads folder of both old and new sites, I found that there were way more images in the old uploads site than in new site. So, I simply copied my whole uploads folder to the new site and replaced new uploads folder with it. Rather than copying, you may also want to use Rsync because it is more effective and resource saving than running whole copy. In my case, I simply used the backup in my Dropbox and uploaded its uploads folder to new server. Note: you may have to correct the file permissions after this operation. Once done properly, my new WordPress site was fully synchronized with my old site and I then performed some additional plugin installs and customization.
Please note that this is my personal way of doing WordPress migration to AWS. There are other ways to do this as well, and some of them might be better than mine. Please follow the procedure that best suits your requirements and scenario.
AWS Load Balancer
Well, I’ve thus got my WordPress blog ready for use. Now, I’d like to perform one last step i.e. setting up an Elastic Load Balancer (ELB). ELB is an application layer load balancer provided by AWS, which sits between Internet and our private internal network. For now, I’m going to setup my ELB to serve HTTP and HTTPS service for my internal web application.
Before setting up ELB, I’d like to first talk about SSL, and associated with that, yet another useful service of AWS i.e. Certificate Manager. I hope you already know that HTTPS is more secure than HTTP, so it’s highly recommended to use HTTPS in your website.
In case of not having a load balancer, we’ve to configure SSL encryption/decryption at the web server itself. To do so, you have to obtain a SSL certificate from a trusted certificate authority, which is generally a commercial provider, or you may also use open-source authority like LetsEncrypt. Once a certificate is obtained, we need to install it in the web server along with the SSL related packages like openssl or mod_ssl. And depending upon your requirements or use case, you may have to further configure your web server’s configuration to utilize SSL service. You see this is quite a hectic or complex task.
However, the good thing with AWS is that you can leave your web servers as they are, and configure your Load Balancer to handle all SSL offloading for your web requests. It also allows you to generate a free SSL certificate inside Certificate Manager, which you can use with ELB and CloudFront for SSL offloading on behalf of your web server. Here’s a look of this site’s certificate in Certificate Manager.

Now, I can create my Elastic Load Balancer to handle my web requests along with HTTPS support. During creation, I configure it to serve HTTP and HTTPS traffic, and use the certificate I generated in Certificate Manager. I then mapped this ELB’s target to my virtual instance. This site’s Load Balancer information looks like this:

Note that I’m not using HTTPS between ELB and my web server. Only the communications between Internet and ELB will be encrypted. This way, my website’s visitors will have a secure connection with my website and my server also won’t have to waste its resources for encryption/decryption. So, we get a dual benefits here. Finally, I’d like to redirect all my HTTP requests to HTTPS. I can perform this redirection simply by adding a statement inside my apache’s configuration file.
[code language=”bash”]
# Add the following lines to this config file
[ec2-user@blog ~]$ sudo vi /etc/httpd/conf/httpd.conf
RewriteEngine On
RewriteCond %{HTTPS} off
RewriteRule (.*) https://%{SERVER_NAME}/$1 [R,L]
[ec2-user@blog ~]$ sudo service httpd restart
[/code]
I’m almost done here. All it is left now, is to point my domain name (blog.sajjan.com.np) to my new web application. Now, if I were to point it to my web server i.e. no ELB present, I would add an A record saying my DNS name resolves to server’s public IP address. However, since I’m using ELB in between, I would add another type of DNS record called Canonical Name Record or CNAME. The reason for this is ELB has a DNS name assigned to it by AWS and this name resolves to multiple IP addresses. So, we cannot just create an A record and map our domain name to ELB’s public IP, which are multiple and even variable. That’s why, we need to add a CNAME record mapping our DNS name to DNS name of ELB. You can verify this by simply pinging or nslookup’ing this site’s address, which will first translate to ELB’s name and then to public IP addresses. If you’re still doubtful about it, you can check popular websites as well.
Well, I said we need to add DNS records to make our website work for our domain name. But you might be wondering where should we even add these records. If that’s the case, don’t worry. I too had this confusion during my starting days. In case you already own a domain name and have been using it with Cpanel, you can simply add the DNS records from your Cpanel’s Advanced Zone Editor. In case you already own a domain name, but haven’t started using it with any service like Cpanel, you need to point your domain’s name-servers to AWS’s name-servers from your registrar’s account. And in case you don’t have a domain name, but would like to have one, you can buy it from AWS itself also or from any other registrars, and follow previous step. Then, you can utilize a service called Route53 in AWS to manage your DNS zones and to also perform traffic engineering across AWS regions based on DNS.
To complete my migration and keep my SEO intact, I added a 301 Redirect feature at my old site so that every web requests to that site will be redirected to a new site. This way, your old visitors won’t have problem browsing your site and your search results will also work.
Well, this is the whole procedures I implemented to get my website up and running in AWS. I hope this has been informative and useful for you. Please let me know of your feedback or queries in the Comments section below. And as always, thanks for reading! 🙂


Leave a Reply