Hello! In this post, I’m going to talk about how to configure a Zimbra server to restrict certain users from sending or receiving mails from external domains. In order to achieve this objective, Zimbra provides two alternatives: one using CBPolicyd (web based) and another using MTA restrictions (cli based). Here I’m covering both methods. First, let’s have a look at CBPolicyd.
Note: The methods mentioned here are tested successfully in ZCS 8.5 and ZCS 8.6. I cannot confirm its validity against other versions.
Installing and Enabling CBPolicyd
Before following this step, you must have CBPolicyd installed and enabled in your zimbra server. So, let’s first install and enable it. To do this, login to your zimbra server and navigate to user zimbra.
[code]
[zimbra@mail ~]# zmprov ms `zmhostname` +zimbraServiceInstalled cbpolicyd +zimbraServiceEnabled cbpolicyd
[/code]
Then, we need to host the cbpolicyd website in Zimbra’s Apache server. This we can do by creating a soft link of cbpolicyd’s source code on apache’s root directory. Here’s how we can do this:
[code]
[root@mail ~]# ln -s /opt/zimbra/cbpolicyd/share/webui /opt/zimbra/httpd/htdocs/
[/code]
Now, we need to configure Cbpolicyd’s source code to connect to appropriate database. To do this, we need to open the config file, comment or delete the existing $DB_DSN variable declaration and declare $DB_DSN as follows:
[code]
[root@mail ~]# vi /opt/zimbra/cbpolicyd/share/webui/includes/config.php
$DB_DSN="sqlite:/opt/zimbra/data/cbpolicyd/db/cbpolicyd.sqlitedb";
[/code]
Finally, we host Cbpolicyd, let’s restart the Zimbra and Apache server.
[code]
[zimbra@mail ~]# zmcontrol restart
[zimbra@mail ~]# zmapachectl restart
[/code]
After both the servers are restarted, we can access the Cbpolicyd by browsing the web url: http://<server-ip>:7780/webui/index.php
Also, if you’ve enforced firewall or iptables in your system to allow only selected service or port in your server, you need to add port 7780 on the allowed port list. If you’ve other firewall between your server and yourself, you need to allow this port on that firewall as well.
[code]
[root@mail ~]# firewall-cmd –zone=public –permanent –add-port=7780/tcp
[root@mail ~]# firewall-cmd –reload
[root@mail ~]# firewall-cmd –list-all
[/code]
Restricting Users from Sending External Mails using CBPolicyd
Now that we’ve got our CBPolicyd server ready, we can start configuring our Zimbra server. Here’s the summary of steps that we need to take:
- Create a Group of local users and assign members
- Create a List of local domains and assign members
- Create a Policy defining source and destination for mail delivery
- Create an Access Control using policy created above
- Enable CBpolicyd
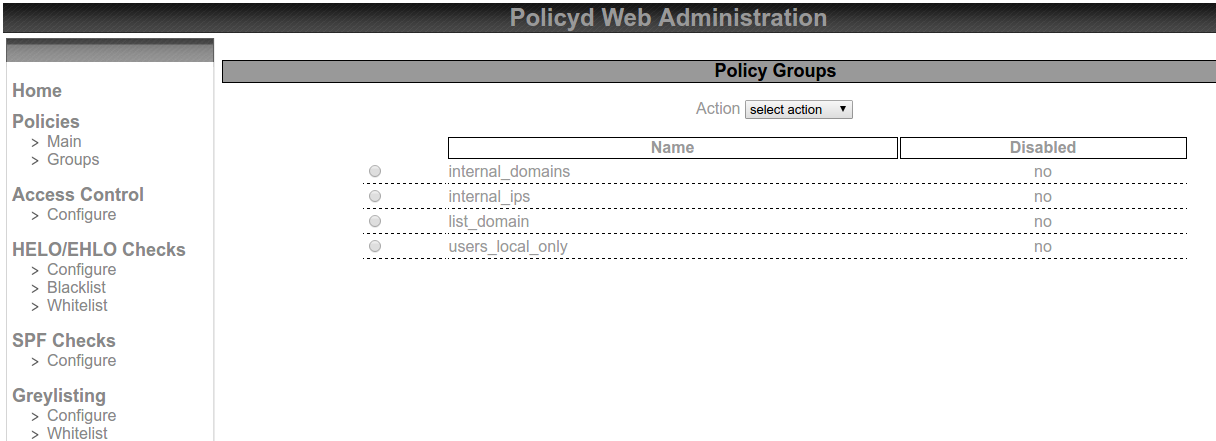
From the menu panel on the left-hand side, go to Groups under Policies. To add a group, click on Action and select Add. For local users, I’ve created group named users_local_only and for local domains, I’ve created list_domain. To add members to these groups, select the group and choose Members from Action. After adding members, make sure you enable all the members and the group itself by setting Disabled option to no. My groups list look like this:
After creating necessary groups, we need to add policies so that we can control mail delivery based on source and destination of mails. To add policy, click on Main under Policies and choose Add from Action. While adding a policy, we need to provide the name and priority of the policy. Then we need to add policy member in that policy, in which we configure the source and destination of mail. My outgoing policy looks like this:


Here, this policy will work for all mails that originate from users in the group users_local_only and destined to domains that don’t belong to group list_domain (notice !%list_domain which represents inverse selection). Similarly, my incoming policy looks like this:


My final policy list is like this:

After my policies are ready, I can utilize these policies and configure my final access control lists. These ACLs will control what action should the server take on matching the mentioned policy. Here’s how my ACLs look like:

Note: Don’t forget to enable every entry you add here unless you actually need to disable it. To enable, just set the Disabled option to no.
At last, let’s activate the policies we configured.
[code]
[zimbra@mail ~]# zmprov ms `zmhostname` zimbraCBPolicydAccessControlEnabled TRUE
[zimbra@mail ~]# zmcbpolicydctl restart
[/code]

This completes the proposed task using CBPolicyd method. Next, let’s cover other method as well.
Restricting Users from Sending Mails to External Domains
As mentioned earlier, this method is based on command line. We begin this process by modifying the config file called /opt/zimbra/conf/zmconfigd/smtpd_sender_restrictions.cf. Inside this file, we add the following line at the top:
[code]check_sender_access lmdb:/opt/zimbra/postfix/conf/restricted_senders[/code]
Next, let’s modify another config file (/opt/zimbra/conf/zmconfigd.cf), in which we define a class representing users who can only send internal mails. While modifying this file, we need to add following lines withing SECTION mta just before RESTART mta.
[code]POSTCONF smtpd_restriction_classes local_only
POSTCONF local_only FILE postfix_check_recipient_access.cf[/code]
[code][zimbra@mail ~]# vi /opt/zimbra/conf/postfix_check_recipient_access.cf
check_recipient_access lmdb:/opt/zimbra/postfix/conf/local_domains, reject
[/code]
Now, we need to create two files: one for local users and other for local domains.
[code][zimbra@mail ~]# vi /opt/zimbra/postfix/conf/restricted_senders
local.user1@sajjan.com.np local_only
local.user2@sajjan.com.np local_only
[/code]
[code][zimbra@mail ~]# vi /opt/zimbra/postfix/conf/local_domains
sajjan.com.np OK
[/code]
Finally, to implement the changes, we need to map the config files to postifx and then restart the MTA service.
[code]
[zimbra@mail ~]# postmap /opt/zimbra/postfix/conf/restricted_senders
[zimbra@mail ~]# postmap /opt/zimbra/postfix/conf/local_domains
[zimbra@mail ~]# zmmtactl restart
[/code]
This completes this blog post. I hope this is useful. Please let me know of your queries or suggestions in the Comment Section below. Thank you for reading!
Leave a Reply